When we bought our first home 13 years ago ... our living room was primed white, so its stay white until last month. I decided that I was sick and tired of the boring and dull color living room and having it feel like in a hospital cave. I wanted to warm up the living room and make it feel a bit cozier and make it more minimalist, means everything serves a specific function. …. less clutter and more appealing.
Since make over is not in our budget, I am trying to keep costs extremely low by Do-it-Yourself (DIY). To reduce spending to much nick-knacks, I thought some accent wall will bring extra drama and color in a living room. One dark color on a shortest wall because it’s the only wall that doesn’t join to another room, and lighter color on a longer wall. My first choice was deep red wine, almost like burgundy. There’s something so inspiring about that color, but my final choice fall to deep green. Green reminds me of nature. Green also has a calming effect when used as a main color for decorating.
Preparation
I took off summer Friday to start painting the ceiling white. After clearing all big objects from the living room, I started painting the ceiling white. Painting the ceiling requires great efforts and patience than the walls. It took me hours to finish the ceiling, it was very doable, but it sure did hurt my arms, my neck, my shoulder and my back ….. ARGH!!! Having done it once, I will never paint the ceiling again.
Repair holes with spackle = CHECK
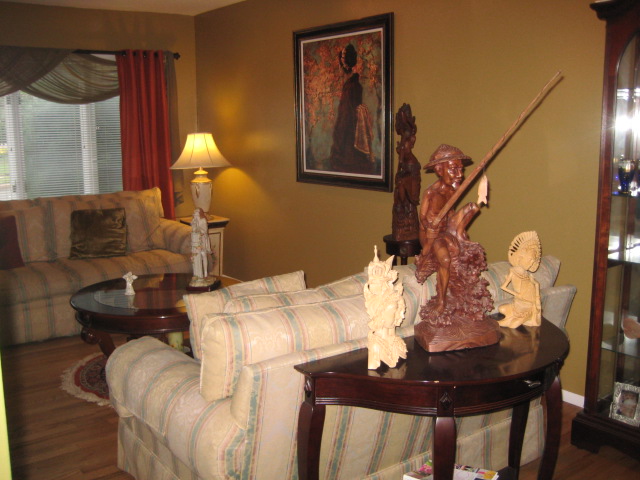
Living Room Area Clear = CHECK
 |
Light Fixture Covered = CHECK
 | ||
Repair holes with spackle = CHECK
 |
Thanks to daughter of mine who helped me with the wall painting.
She had fun painting walls using some of her techniques like this picture ..... Please don't ask me where the men of the castle are? ...... ??? ...
 |
| Good techniques |
Due to the house layout, I foresee us using the kitchen primarily to cook and guests can remain seated at the bar area or in the adjacent living room. The bar seating area being opened up to the living room also allows for the cooks to interact with guests in the living room. Our goals were to open the spaces to each other and to reorganize and upgrade the kitchen in a warm and elegant entertaining area. Therefore, a dated and save energy appliances are needed, since the oven didn't work for almost 2 years, old refrigerator been around for over 13 years and already make some noise, the over-the-counter microwave was greasy, and they all screamed for a change. Also, needs to create a pleasing flow of the rooms into each other.

And ... oooohhh, I almost forgot I still need to get rid off the smelly, worn and nasty light blue carpet on the stairway. But, whose gonna do it???? I am sure no one willing to help with this one, since none in the house was aware of the smell and the color rejection. I convince myself that light sage green wall will look just fine with the light blue carpet .... ja ... ja ... ja ... and I kept saying that to myself over and over, until one day, I came home from work and can't take it anymore, and start reaping the carpet. My best tool was my knuckles, yes!!, I used my knuckles to pull off the carpet because I can't use my weak nails. Youtube on "how to" was my best friend around that time.
OMG .. I started it and I gotta finish it ....... have no idea how ..... YET!!!

Next .... I scrape the paint on each side of the stairs and realized that's not necessary cuz the side won't be varnished.

Voilaaaa ...... ready to paint the riser

Did I tell you that I didn't realize dusts will be all over the living room???
Of course NOT!

But after a hard work and long night, the living room - kitchen - stairway make over combo is completed. Seeing the results can be very satisfying. Like I said, this DIY make over does not breaking much of our bank account, instead I felt a great sense of accomplishment. I followed a lot of recommendations for getting stuff off the wall, dumping fake flowers, ditching a lot of knick-knacks, removing a third of the furniture. Less stuff means less to clean!!!
Less clutter, warmer living room

The adjacent kitchen view from the living room

The save energy appliances installed and same color paint flow from the living room to have a smooth continuity

Big art painting was chosen, and that's going to be the only piece of art that will fill one side of the living room wall. I let the flow of space and light create much of decoration without the confusion of ornamentation.
No more clutter wall!
Proudly saying "I DID IT MY WAY .... MYSELF"

Once I simplified the room, I Sit back, I relax, and I enjoy, took a moment to look around and enjoy it and feel the satisfaction. This is the reward for a hard work.
Ahhhh. So nice!
Now, I can start focusing on my jewelry :)
Wowww ......... you made it till the end of this blog?? Thank you guys for reading.
Mia
woilaaa,,look so nice tante mia,,,jadi pengen kesana,,hahahha,,i'll help you, you know...or papa aja yang kesana..hahhaa..:D
ReplyDeletewow tante.....semuanya sendiri???? i salute youuuu.....
ReplyDeleteaku juga lagi "beres2" rumah..tapiiii.....sibuk merintah tukang dan orang design interior...
shame of me...
*malumalumalumalu*
kiss..kiss...
tantri
Fani, you are welcome to come visit, kapan ya??
ReplyDeleteTantri, I wished I could pay some tukang and be the boss, labor disini costly banget.
Mia... si chaly lagi nyari tukang buat nyelesaiin kamar kost tuh... minat gak..?? hehehe.. ;p
ReplyDeleteDave, bilang suruh ngomong sendiri, hanya ongkos pesawat dan lodging dan entertainment .. :)
ReplyDeleteThere's a saying that If there's "No pain, No Gain"..Wow great job superwoman.I think you can join the HGTV show "Mia's Before & After"..lol:)Love your color splash:)))
ReplyDeletegracie